Planning
Shoot Ideas
For shoot #1, I'm planning to head out to the town centre to find photos that pose similarities to what Binet bases her photos on. For example, I'll be exploring different areas of buildings, as well as bringing in some aspects of Sudek, by using reflections through windows and glasses. Moreover, going to the town gives me the ability to focus on a variety of different areas other than just Sudek's work Potentially, in this shoot or the next, I could take Maier's focus and intertwine it with Binet's to make something to do with mirrors. In addition to this, I can experiment with different compositions to further improve the work on my way to making the work for the final exam.
Image Bank
Inspiring Images

Contact Sheet
All Photos Taken

5 Best Photos
The Top 5 for Final Piece


2 Photos to Improve
The 2 that Failed to Reach the Requirements


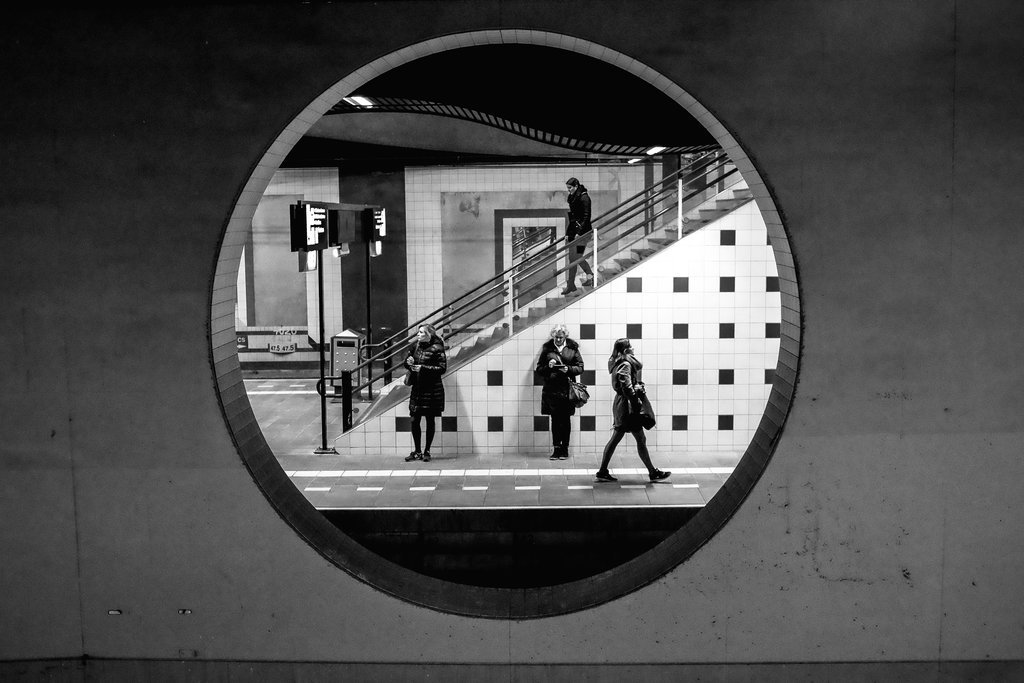
The photos shown all are an attempt at correlating with Binet's best work in architecture and modern art. I used time during a break to get to different locations around my area, to photograph a variety of different pieces which could link back to the artist in question. Furthermore, I took ideas from the image bank, as shown by the photo of the window. In my opinion, this was a very successful shoot in trying to find my way into this new unit, and was a great introductory shoot as it took a variety of areas.
In the five best photos, I took a multitude of modern-industrial themed pieces. The first two were of a bench outside the town centre, in which the shadow had been really interestingly placed that it hit in front of said bench. This played a part in the perspective of the photo, making the eye not only focus on the bench but also the shadow below, and how the shadow is playing a part in curves and circles, because of how it utilises negative space to create the replication of the original object. However, to distinguish between the two I decided to have two separate photos to further direct the attention from the audience or viewers. One issue I had with these and 8 other photos though, is the mistake of leaving a specific white-balance on that ended up tinting the photos a hue of blue. However, this can be easily rectified through Photoshop. The third photo is of an abandoned office building nearby, which featured a very interesting window that was reflecting very clearly, as well as having a very industrial and haptic look to it. Not only does it give a clear reflection of a much more newer building behind, its also like you can actually feel the photo by looking at it. The contrast is so significant that the texture of the building's concrete is entirely clear to the head. Furthermore, there is a modest amount of depth due to the way the building was created, as well as the reflection.
The fourth and fifth photos were both taken in and around the town park in my local area. The fourth features a signpost which piqued my interest due to the sheer amount on the post, giving a lot of depth and information to the viewer, as well as having great composition when it came to the photo as a whole. The fifth photo was taken of a handrail in the centre of the town park, where the endings had a really interesting style to them, which was perfect for the photo-shoot.
In contrast to the five best photos, the two worst ones are, obviously, quite unexciting. The first one is of a bridge over a shopping area, which I thought had a good handrail for a photo. However, due to the rest of the photo not really looking visually pleasing, it has been put here. Moreover, I took a photo of several lampposts along a cycle path near the town park. I had done this because of the way they were almost creating a leading line along with the way the path was headed, focusing attention slowly along the path. However, it doesn't have much detail or focal points, as well as the depth not being used at all correctly to capture the true intention of the image. In my opinion, I could've got a lower angle focusing more on the path rather than the lampposts, but also used them for depth. The fourth photo couldn't really have been improved to match curves, however it could've been made better by focusing directly on the grid to the right of the photo.
Potential Ideas & Experiments
Exploring new Ideas


References
Photos to Link to Ideas & Experiments


These experiments were extremely fun to create. It was like a bit of freedom on what to do, rather than primarily focusing on my main theme of black and white. The first of the two was just an experiment on how it would look with an abstract theme to it, using the mirror as a prime spot for high saturation and altered hue. I then took that opportunity to do the same with the sky, to create something reminiscent of abstract British photos, much like some "Britpop" album covers. The other was an idea I had which links to those typical images you see which links to something inspiring of sorts. It was more an experiment for if I could fully recreate it to make it look as real as possible, so the text on it is less important than it would seem. I feel I did a pretty good job recreating the sign, using the patterning and dimming the white, as well as spot healing a lot of the sign to make space for the photo. In my opinion, I feel it came out very good. My ideas for improvement would be to increase the size and make the warp perspective a bit more significant, as well as changing to the correct font among other things.
Camera Settings
How I Took the Photos
I used a Canon EOS 1100D to take the photos. I used a multitude of settings; an F-Stop between F5.0 and F8.0, shutter speed between 1/400 and 1/2000, and an ISO between ISO200 and ISO3200. Furthermore, for the first ten images I used a custom white balance of a fluorescent light, although that was not intentional. The photos were each taken using the eyepiece, and each using the interface inside of the eyepiece showing the important settings. I also made sure to experiment with how much shutter speed to use to raise or lower the exposure.
Edits
How I Edited them in Post

 Next I edit the Clarity - Saturation in accordance to what I need, although I almost always remove any vibrance or saturation as an alternative of clicking B/W. Then I altered the clarity to match what matches the right look for the photo, as well as increasing the dehaze to give more of a gritty vibe.
After editing these, I open the image(s) into Photoshop and use the spot healing brush to remove any blemishes or spots on the photo which might not look visually pleasing. I do this by simply clicking on the tool and dragging the brush over the selected areas.
 Finally, I complete any further edits I need to complete by using the adjustments GUI found to the right of the program. After all of that is finished, I close the photo after saving it.
Final Piece
Final Photos and Future Improvement


No comments:
Post a Comment